When you develop a wordpress theme, the idea is to make it usable by other people. Even though I’m developing this one for my one purpose, I have to keep that in mind. For instance, listing categories with images in the header might not suit everyone’s needs.
That’s the reason why wordpress themes usually allow you to select number of options in a dedicated admin section. I want to show you how you can easily customize your checkboxes using jQuery, so that they don’t look like the default ones you see everywhere.
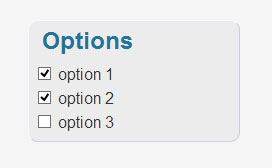
 Let’s say we have a simple liste of options with checkboxes, like the one in the example.
This could be the HTML structure used to do so :
|
1 2 3 4 5 6 7 8 |
<div> <h2>Options</h2> <form id="my_form"> <p><input type="checkbox" id="option1" name="option1" /><label for="option1">option 1</label> <p><input type="checkbox" id="option2" name="option2" /><label for="option2">option 2</label> <p><input type="checkbox" id="option3" name="option3" /><label for="option3">option 3</label> </form> </div> |
So, what are we to do with jQuery ?
Well, first thing’s first, we need to hide those checkboxes, and I really mean hide, and not remove. Then, instead of the checkbox, we want an image that will reflect the state of the checkbox : checked or not. The image – or icon – could be added as a DOM element to the label of the checkbox, or just inserted as CSS background. We’ll use the later as it only requires changing a class name. And finally, we need to deal with the click action on the labels, so that the icon is changed reflecting the state of the checkbox.
Ok then, let’s define our CSS classes first, if the icons are 16px wide, it could be something like this :
|
1 2 3 4 5 6 7 8 |
label.ok { padding-left:16px; background:url('images/ok.png') left center no-repeat; } label.ko { padding-left:16px; background:url('images/ko.png') left center no-repeat; } |
And here’s for the jQuery :
|
1 2 3 4 5 6 7 8 9 10 11 |
$('#my_form input[type="checkbox"]').hide().each(function() { if ($(this).prop("checked")) { $(this).next('label').addClass('ok'); } else { $(this).next('label').addClass('ko'); } $(this).next('label').click(function(){ $(this).toggleClass('ko').toggleClass('ok'); }); }); |
Quite simple, isn’t it ?
 Just so that you know why the checkboxes must be hidden and not removed : when the form is submitted, their state is taken into account ! Even though they’re hidden, they change from checked / unchecked when you click on the label.
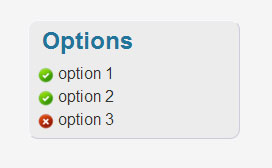
And here’s what it looks like : pretty cool for very little effort !
You’d probably find loads of customized form elements on the web, but if you want to make your own, this is the way to go !


