
In the previous post I showed a basic example provided in the Alternativa pack. I’m going to use that as a working basis to explore the alternativa platform features. First, I’m going to change the appearance by adding textures, lights and shadows. Let’s see how this can be put into place.
Before doing any of that though, I’d like to add a floor in my maze, so that the player doesn’t feel like he’s hanging in the air – I’m going to call the user “the player” as this demo in first person view feels like a game. This is quite easy, you just need to add a cube at z=-BOX_SIZE in the the maze creation loop.
Adding textures may be achieved using a simple embed tag – as I’m only going to have very few light-weight images, I don’t to go through a loading process. Note that image size must be a power of 2, in this case I’ll use images that are 128px x 128px :
|
1 2 3 4 5 |
[Embed(source = "../images/floor.jpg")] static private const myFloorTexture:Class; private var floorTexture:BitmapTextureResource = new BitmapTextureResource(new myFloorTexture().bitmapData); [Embed(source = "../images/wall.jpg")] static private const myWallTexture:Class; private var wallTexture:BitmapTextureResource = new BitmapTextureResource(new myWallTexture().bitmapData); |
So now I have 2 variables containing the bitmap textures, I’ll be able to use later when applying to my objects :
|
1 2 3 4 5 6 7 8 9 10 11 12 13 14 15 16 17 18 |
for (var i:int = 0; i < MAZE.length; i++){ for (var j:int = 0; j < MAZE[i].length; j++) { var box:Box = new Box(BOX_SIZE, BOX_SIZE, BOX_SIZE); box.setMaterialToAllSurfaces(new VertexLightTextureMaterial(floorTexture)); box.x = BOX_SIZE * i; box.y = BOX_SIZE * j; box.z = -BOX_SIZE; rootContainer.addChild(box); if (MAZE[i][j] == 0) continue; box = new Box(BOX_SIZE, BOX_SIZE, BOX_SIZE); box.setMaterialToAllSurfaces(new VertexLightTextureMaterial(wallTexture)); box.x = BOX_SIZE * i; box.y = BOX_SIZE * j; rootContainer.addChild(box); } } |
Applying a bitmap texture means creating a material and there are several to choose from. The basic FillMaterial won’t do of course, but neither will the ordinary TextureMaterial as it doesn’t support lighting, and that’s exactly what I’m going to add next. So I’ll go for VertexLightTextureMaterial which uses dynamic lighting.
While I’m at it, let’s put a sky in the scene. Alternativa has a special class for this purpose, the skybox ! Basically, it’s just a big enough box to contain the whole scene with its surfaces turned inwards. So we just need to apply a texture of a beautiful sky and you have it ! Alternativa provides a nice example of a skybox, so I won’t bother too much with looking for something else.
|
1 2 3 4 5 6 7 8 9 10 11 12 |
[Embed(source = "../images/sky_left.jpg")] static private const left_t_c:Class; private var left_t:BitmapTextureResource = new BitmapTextureResource(new left_t_c().bitmapData); [Embed(source = "../images/sky_right.jpg")] static private const right_t_c:Class; private var right_t:BitmapTextureResource = new BitmapTextureResource(new right_t_c().bitmapData); [Embed(source = "../images/sky_top.jpg")] static private const top_t_c:Class; private var top_t:BitmapTextureResource = new BitmapTextureResource(new top_t_c().bitmapData); [Embed(source = "../images/sky_bottom.jpg")] static private const bottom_t_c:Class; private var bottom_t:BitmapTextureResource = new BitmapTextureResource(new bottom_t_c().bitmapData); [Embed(source = "../images/sky_front.jpg")] static private const front_t_c:Class; private var front_t:BitmapTextureResource = new BitmapTextureResource(new front_t_c().bitmapData); [Embed(source = "../images/sky_back.jpg")] static private const back_t_c:Class; private var back_t:BitmapTextureResource = new BitmapTextureResource(new back_t_c().bitmapData); |
And then the skybox is added to the seen :
|
1 2 3 4 5 6 7 8 9 |
skyBox = new SkyBox(100000, // Size of skybox new TextureMaterial(left_t), new TextureMaterial(right_t), new TextureMaterial(back_t), new TextureMaterial(front_t), new TextureMaterial(bottom_t), new TextureMaterial(top_t), 0.01); // Padding from the edges rootContainer.addChild(skyBox); |
Et voilà : try out this demo !
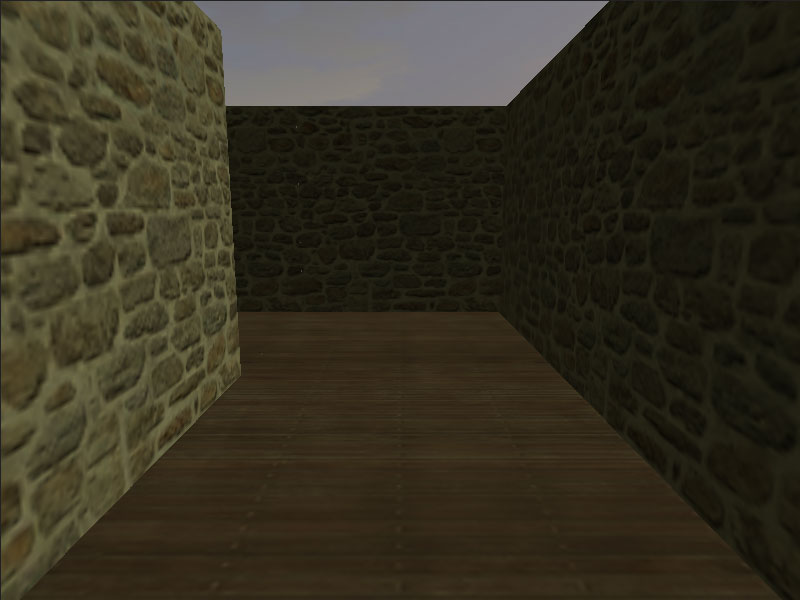
Alternativa test with textures and light
Ok, so I cheated, you probably noticed ! You shouldn’t see anything except for the skybox as I haven’t yet added any lighting !
Let’s put 2 different light sources, one ambient and one directional :
|
1 2 3 4 5 6 7 8 9 10 11 |
ambientLight = new AmbientLight(0x888855); ambientLight.intensity = 0.33; ambientLight.z = 10000; rootContainer.addChild(ambientLight); directionalLight = new DirectionalLight(0xC9C999); directionalLight.x = 10000; directionalLight.y = -10000; directionalLight.z = 5000; directionalLight.intensity = 0.66; directionalLight.lookAt(0,0,0); |
The code is pretty much self explicit. If you need detailed explanations, please feel free to post your question.
I also deactivated the [E] and [C] keys in the demo and activated [Q] and [Z] for french keyboards. That was easily done :
|
1 2 3 4 5 |
controller = new SimpleObjectController(stage, camera, 400); controller.unbindKey(67); //C controller.unbindKey(69); //E controller.bindKey(81,"ACTION_LEFT"); //Q controller.bindKey(90, "ACTION_FORWARD"); //Z |
Ok then, that’s already quite neat, but wouldn’t it be nice to have casted shadows for a more realistic feel ?
First I need to change the material as VertexLightTextureMaterial doesn’t support shadows. Well, that’s a drawback, but it will be interesting to explore a new type of material : StandardMaterial. Of course, you need to import the appropriate packages, here a some of those I have needed to add :
|
1 2 3 4 5 6 7 |
import alternativa.engine3d.materials.TextureMaterial; import alternativa.engine3d.materials.StandardMaterial; import alternativa.engine3d.objects.SkyBox; import alternativa.engine3d.resources.BitmapTextureResource; import alternativa.engine3d.lights.DirectionalLight; import alternativa.engine3d.lights.AmbientLight; import alternativa.engine3d.shadows.DirectionalLightShadow; |
So, let’s first look at how we create the new material. This material supports maps such as transparency, diffusion, specular… you could have an image file for each if you wanted ! You can also use a plain color, like in my example :
|
1 2 3 4 5 6 7 8 9 10 11 12 13 |
var floor_diffuse:BitmapTextureResource = new BitmapTextureResource(new MyFloorTexture().bitmapData); var floor_normal:BitmapTextureResource = new BitmapTextureResource(new BitmapData(1, 1, false, 0x7F7FFF)); var wall_diffuse:BitmapTextureResource = new BitmapTextureResource(new MyWallTexture().bitmapData); var wall_normal:BitmapTextureResource = new BitmapTextureResource(new BitmapData(1, 1, false, 0x7F7FFF)); floor_diffuse.upload(stage3D.context3D); floor_normal.upload(stage3D.context3D); wall_diffuse.upload(stage3D.context3D); wall_normal.upload(stage3D.context3D); var floorMaterial:StandardMaterial = new StandardMaterial(floor_diffuse, floor_normal); var wallMaterial:StandardMaterial = new StandardMaterial(wall_diffuse, wall_normal); floorMaterial.specularPower = 0.4; wallMaterial.specularPower = 0.4; |
Of course, applying the material to the boxes will change in consequence, as we now have a variable containing the material information. And now, for the shadows :
|
1 2 3 4 5 6 7 |
shadow = new DirectionalLightShadow(10000, 10000, -6000, 4000, 2048, 2); shadow.biasMultiplier = 0.995; shadow.centerX = 2500; shadow.centerY = 2500; shadow.centerZ = 500; directionalLight.shadow = shadow; // shadow is applied by the directional light |
I’ve had to mess around a lot with the parameters before I got an aspect that suits me. y knowledge in this matter is prettypoor, so I can’t really detail them either. I can only suggest you take a closer look at the Alternativa specs, demos and tutorials if you really want to figure it out.
So we just need to define the shadow casters, in this case the walls. So we change the construction loop, here’s the part for the walls :
|
1 2 3 4 5 6 |
box = new Box(BOX_SIZE, BOX_SIZE, BOX_SIZE); box.setMaterialToAllSurfaces(wallMaterial); box.x = BOX_SIZE * i; box.y = BOX_SIZE * j; rootContainer.addChild(box); shadow.addCaster(box); |
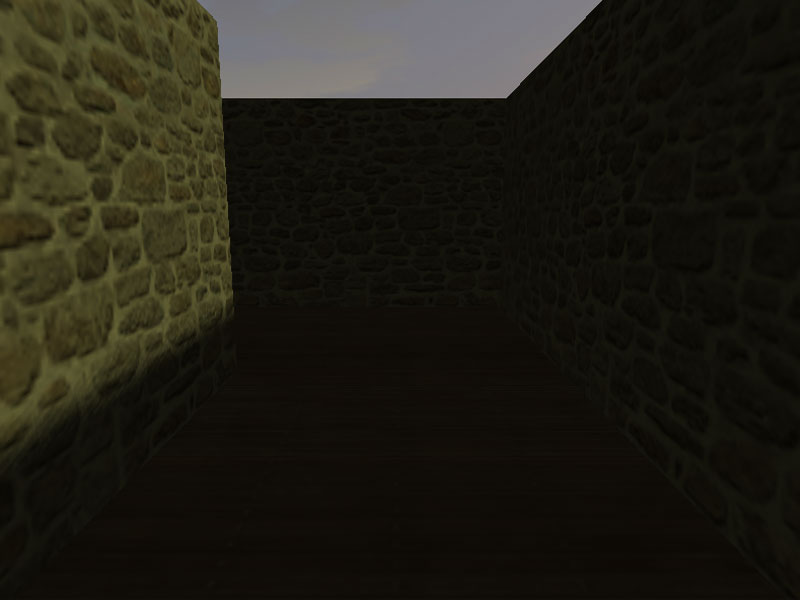
Alternativa test with shadows
It’s a lot darker, but the shadow effect turns out quite nice, and how about the reflection of the sun light on the top surfaces of the walls ?


